Kintsugi

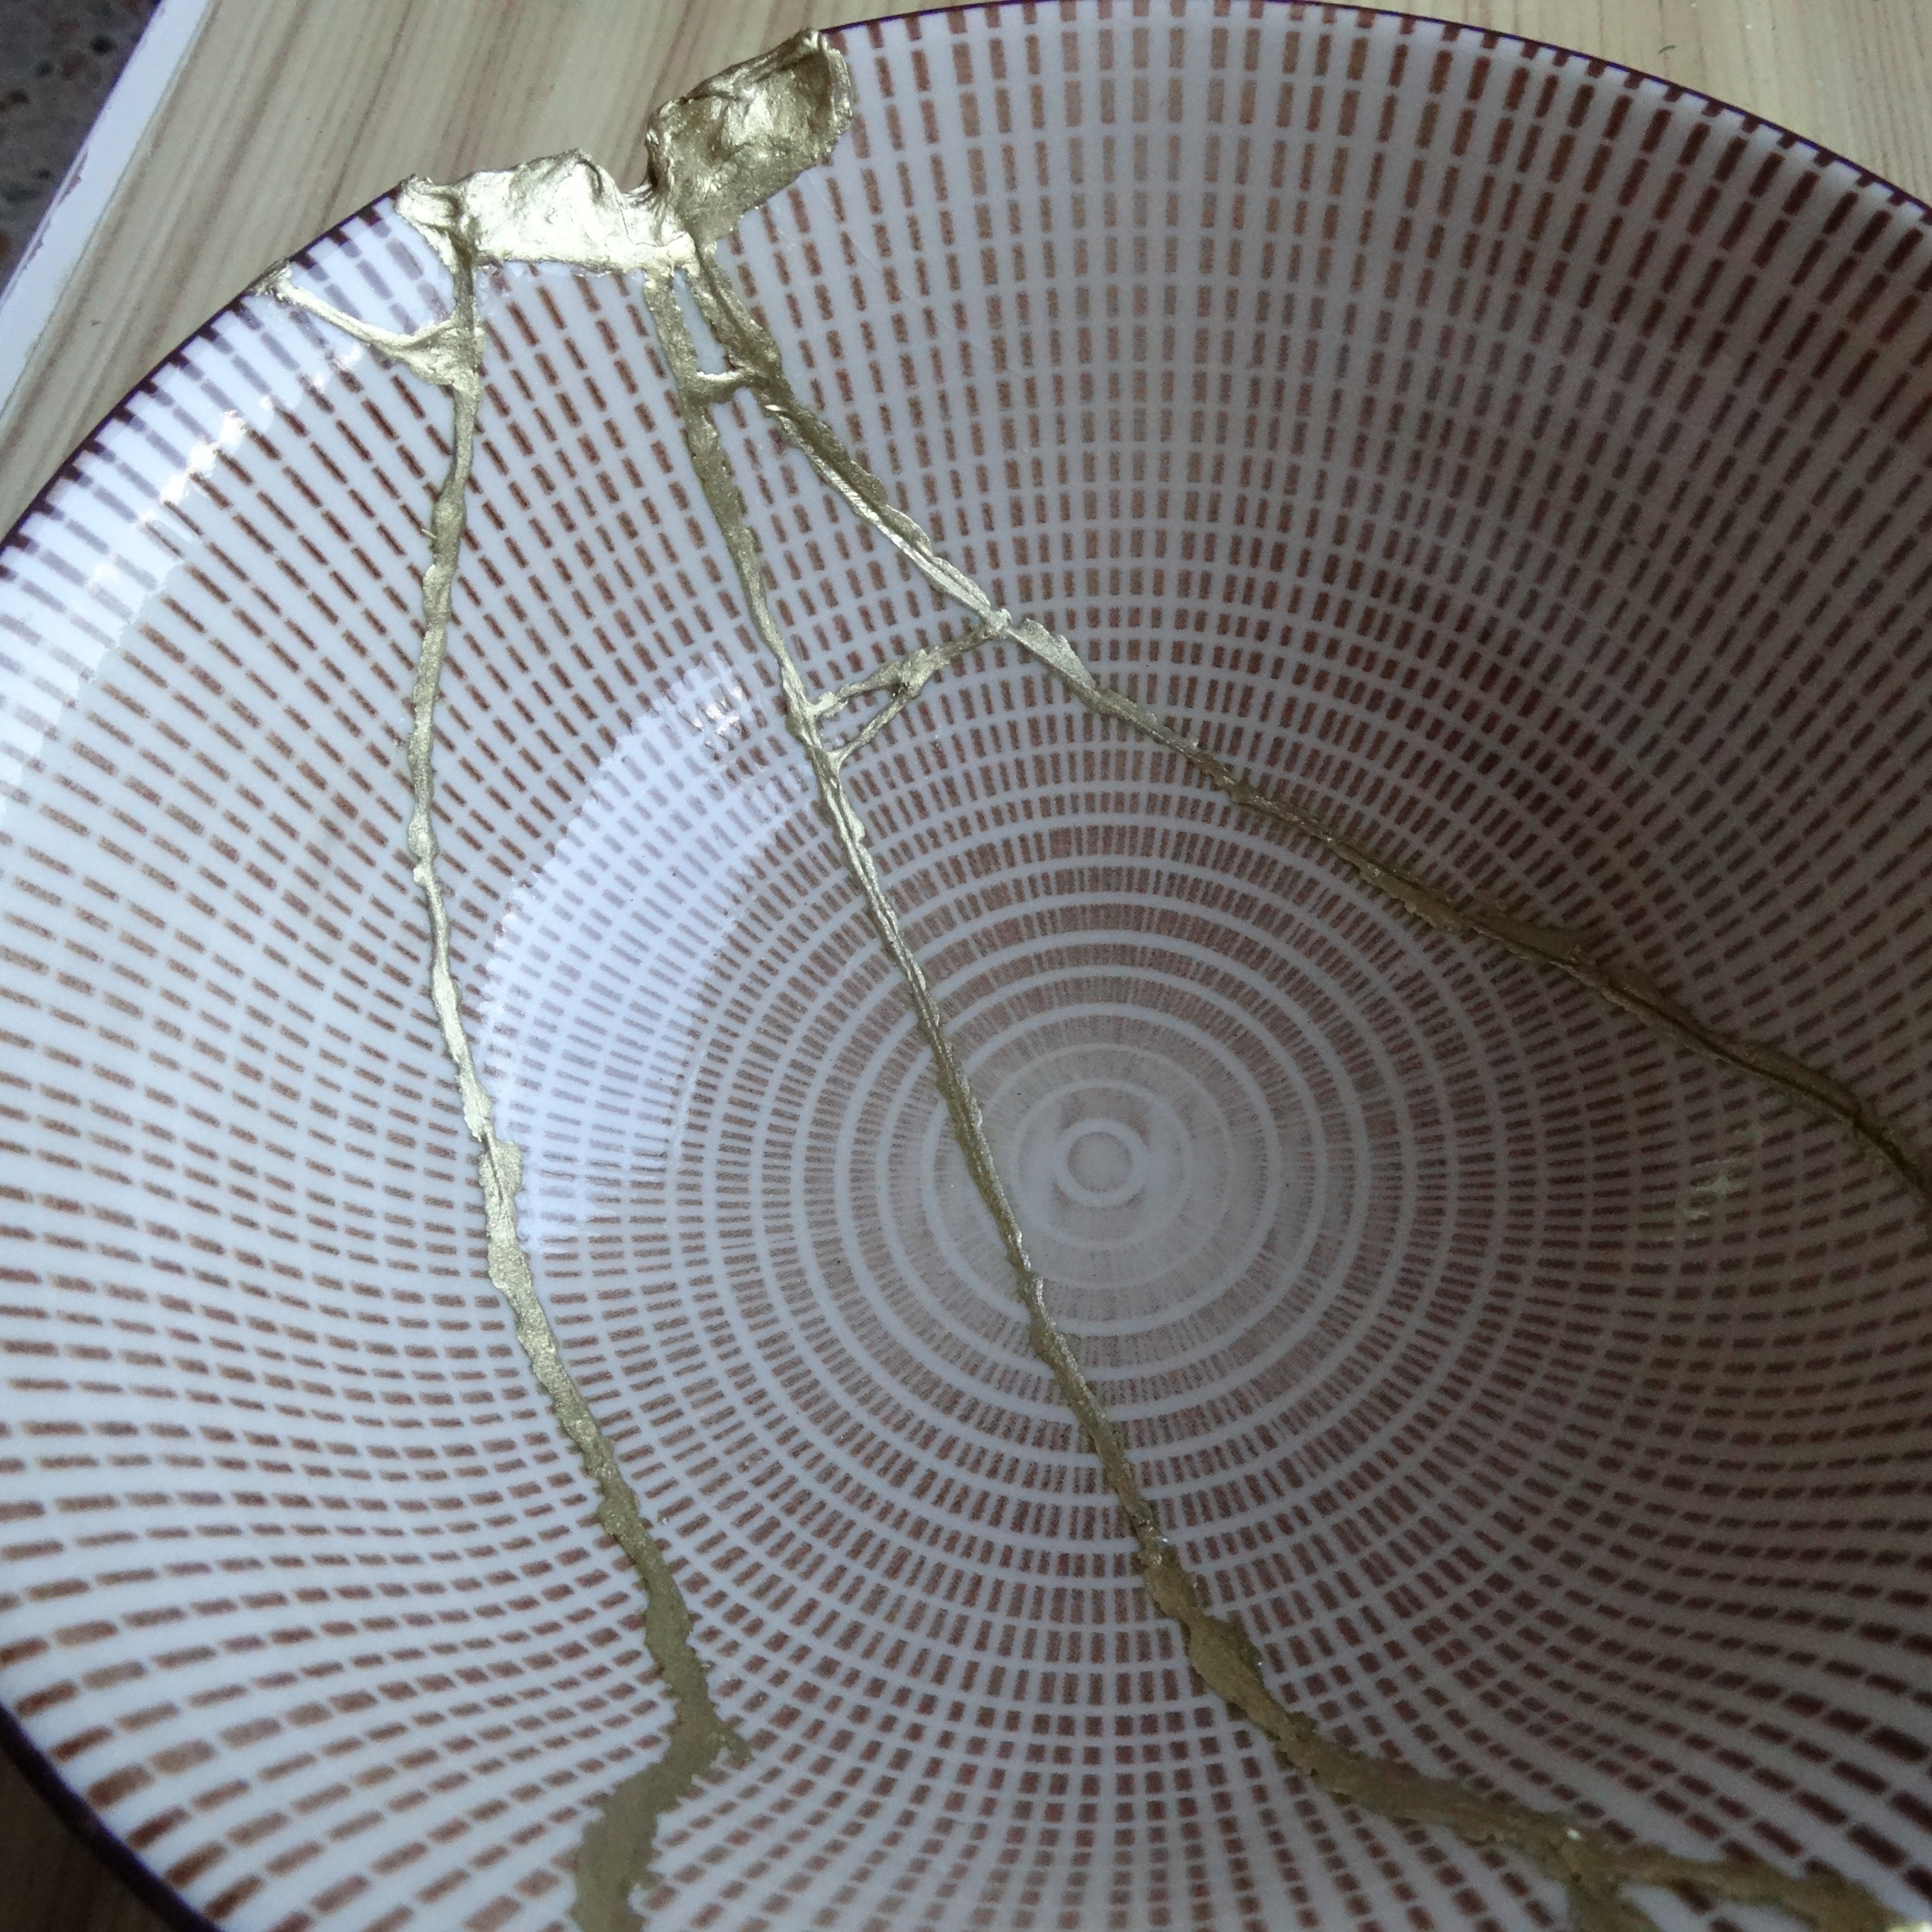
Most people I assume have heard or at least seen something of Kintsugi. It's another aspect of Japanese culture that has leaked into the rest of the world, like origami or bonsai. Kintsugi is the technique of mending broken pottery with the goal of making it more beautiful than it was before by highlighting the break lines with gold.
You'll mostly see it done with some form of synthetic epoxy, or simply glue, with something gold-like applied on top or mixed in. Traditionally it was done with an organic lacquer from a specific species of tree, and real gold dust.
As a lover of both tradition and finding natural ways to do things, I wanted to find out how I could perform kintsugi at home, as close to the traditional method as possible. Additionally none of the other methods I've seen produced a satisfying enough result. I'd seen some of the art and looked into it, but got more motivated to find out how to do it when I dropped a favorite plate of mine.
It turned out to be very hard to find out what exactly the most traditionally Japanese technique is, as most info and tutorials you'll find online are just about the “modern western” method, which is to say doing it the easy way with non-natural materials. I'm still not a hundred percent sure on the exact process but I know that the japanese mainly used Urushi lacquer, which as I mentioned before comes from the resin of a specific species of tree and is expensive and hard to find outside of Japan. Some people told me it couldn't be done without Urushi, but it being a tree resin got me thinking that perhaps other types of tree resin could work too. Amber for example, which is most well-known in its fossilized form sometimes preserving some prehistoric insect that got trapped in it.
As I am fortunate enough to live in Florence which has the most amazing art store, Zecchi, I found a couple types of resin they sold, amber among them. I went with Copal resin for my first tests though as it was slightly cheaper and some internet research suggested it was quite similar to amber. They sell it as chunks of hardened resin, which only needs pure alcohol to be dissolved and turned liquid again. In my research I found that for the glue/cement part of the process the Urushi lacquer was mixed with some flour and water, so I did exactly the same with the copal resin. It can be a bit tricky to get the right consistency for both the copal solution and the amount of flour you want to mix it with, but in the end it worked surprisingly well. It takes a long time to dry though. After 2-3 days the two joint pieces of whatever pottery you're trying to fix are fairly firm together but I found it takes at least 7 days to fully dry most times, if not longer, but when it does it's a surprisingly strong bond. Some of the sources I found while researching said the whole process of fixing even a single piece of pottery could take as long as a month and after the first tests I realized that was mostly due to the drying times.


Aside from the oxidizing copper dust there's another big obstacle that I haven't overcome yet, which is that in anything more than a paper-thin film the copal resin doesn't seem to ever fully harden. This isn't a problem for bonding two pieces together, as when you press hard there is only a minimal amount of resin in the crack. Sometimes you might miss a piece of your broken pottery though and you need to fill it in. In theory, I thought the resin should return to its solid state after all the alcohol it was dissolved in evaporates, but this doesn't seem to happen. Perhaps amber would react differently but I have yet to try it.
Lastly there's the question of whether what you mended with these materials is appropriate for use, or should only be used decoratively. The copper dust might be the worst if ingested out of the materials used, but the capable employees at Zecchi told me that the clear lacquer might also not be food safe, not to mention that it probably wouldn't stand up to regular dishwashing. The copal resin too in all its states becomes malleable when subjected to low amounts of heat so that probably wouldn't survive a trip through a dishwasher.
Then again, maybe kintsugi pieces were never meant to be used as they were before they broke, but I haven't been able to find that out. It would be nice to be able to mend a cup with this technique and drink from it again but maybe that's not realistic using the materials I've described here. Even Urushi lacquer in its raw form can cause a severe rash for some people.
For any questions, or if you know a solution to either the oxidization or the hardening problem, leave a comment, or contact me on social media @rozendaalarts, or via email; info@rozendaalarts.com


Comments
Post a Comment